Imagine craving for a delicious hamburger, only to come home to find a stone-cold piece of frozen ground beef. Or perhaps you want to prepare a new recipe but don’t have fresh meat to work with. In either case, there are many methods to learn how to cut frozen ground beef and have it ready just in time.
You can cut frozen beef before or after defrosting it. While it’s frozen, you can use knives, a butcher saw, or a meat slicer. If you want to defrost the meat first, you can do it in the refrigerator, under cold water, or via the microwave.
But dealing with food is always tricky, so you have to know what you’re doing at all times. Read this article to find out tips, recommendations, and safety measures you must follow to prepare the meat properly.
How to Cut Frozen Ground Beef without Defrosting
Option 1: Saw the Beef Block
A butcher saw is the ideal tool for cutting large pieces of frozen beef. Here’s how you use it safely for this specific purpose.
- Wear a safety glove to protect your non-dominant hand, which will hold the meat. Consider gloves made with metal links to prevent cuts in case the saw slips.
- Place the saw’s blade on the area of the meat you want to cut. Use your dominant hand to hold the blade securely. Apply a bit of pressure to set the teeth of the serrated blade to gain a good starting point.
- Make a push-and-pull cutting motion to rip through the frozen meat. Repeat as much as needed until the blade cuts through completely.
Downside: Only suitable for large cuts of frozen meat.
Option 2: Using Knife
You can cut frozen beef using either manual or electrical knives. Learn how-to here.
Using a Manual Knife:
- Choose a heavy-duty knife. The knife must have a serrated edge to make smoother cuts. Plus, make sure it’s sharp to prevent leaving a jagged edge. If you’re cutting boneless meat like chicken breasts, use a standard knife for fine cuts. However, go with a butcher’s cleaver for chopping.
- Run the piece of meat under cold water for three minutes. If you don’t soften the meat, the blade of the knife will slip off.
- Place the meat on a plastic cutting board to avoid contaminating other surfaces. Hold the meat firmly with your non-dominant hand.
- Start cutting through the meat using the knife in a slow sawing motion. As you reach the center of the meat, apply more pressure to cut through.
Downside: Cutting frozen meat with a manual knife takes a lot of time, and it only works with smaller pieces of meat.
Using an Electric Knife:
- Find a flat surface of the countertop with an outlet nearby to plug in the electric knife. If the cord is too long and interferes, loop it around your dominant hand.
- Place the serrated edge over the meat, right where you want to cut. Use your non-dominant hand to hold the meat, and pull the trigger or switch to actívate the blade. Make sure to keep your fingers at a safe distance.
- Push the electric knife to cut through the meat. Electric knives have saw-like blades that cut back and forth through meat quickly. Apply pressure, and push and pull the knife in a back-and-forth movement if the blade is struggling to cut the meat.
- Cut only half through the meat, and turn it around. Put it on the side in a way that the first cut faces toward you. Align the blade with the cut, and start the knife again. Guide the knife to finish the cut.
Downsides: It may be necessary to rotate the piece of meat multiple times before completing the cut.
Option 3: Opt for a Meat Slicer Machine
Alternatively, you can use a meat slicer to cut thin slices of frozen meat. This manual tool lets you cut food in less time, but it won’t cut in large portions. Use it only when recipes require thin meat slices. Here’s how you do it.
- Place the meat slicer over a table with a flat surface.
- Grab the piece of meat, and put it over the bracket. Some slicers have a V-Shape bracket to securely hold the meat.
- Use your dominant hand to get a firm grip on the handle, and hold it strongly.
- With your non-dominant hand, guide the chunk of meat towards the blade.
- Use your dominant hand to slice the frozen meat into smaller and thinner pieces.
Downside: Attempting to cut hard frozen solid could damage the blade. Slightly thaw the meat if necessary.
How to Cut a Frozen Chub of Ground Beef with Defrosting First
Cutting frozen beef without defrosting it first is possible, but it can ruin the blades quickly. Instead, you can follow one of the next methods to cut the meat easily without the risks of messing up your cutlery or tools.
Option 1: Defrost the Ground Beef
There are three ways to safely defrost ground beef, according to the U.S. Department of Agriculture.
- Defrost in refrigerator. Place plastic freezer bags with the ground beef in the refrigerator, preferably over a plate to avoid dripping over other items. Cook the meat within two days after defrosting.
Ground beef defrost time in the refrigerator: 12 hours in original packaging, 2 hours in flat, sealable bags. One pound of ground beef would take 24 hours to thaw.
- Defrost in cold water. Place the frozen ground meat into a bowl and pour cold water to submerge it for defrosting. Change the water every 30 minutes. Cook immediately after defrosting.
Ground beef defrost time in cold water: Frozen flat minced beef thaws in ten minutes, but thicker cuts of meat take around 30 minutes per half a pound.
- Defrost in a microwave. Put the beef inside of a microwave-safe and resealable bag, and place it over a plate. Make sure to leave a small opening to allow steam to escape.
Ground beef defrost time in microwave: Around 3 to 5 minutes. It may vary depending on the microwave model.
Recommended option: If you know the exact amount of meat you’ll need, defrost it in the microwave. It will be faster, and you won’t have to refreeze any leftovers. For large quantities, defrost the ground beef in the refrigerator. This way, you can refreeze the amount of meat you don’t use.
Option 2: Microwave the Ground Beef
Defrosting the frozen beef in the microwave is one of the fastest and easiest ways to cut it afterward. The method is simple, just follow the next steps.
- Place the frozen ground beef on the plate inside of the microwave.
- Set the timer to the defrost setting, which can take between one or three minutes.
- When the timer is reaching half the time set, turn the meat over to get an even defrosting on both sides.
- Once the cycle finishes, cut the beef and cook it. Don’t leave it uncooked because at this point bacteria may start to grow.
Downside: High chances that the meat starts to cook while defrosting, allowing bacteria to be active.
Option 3: Use a Pressure Cooker
If you don’t want to use the microwave, a pressure cooker is an excellent alternative you can try. It will thaw the meat quickly and have it ready for your recipes in no time.
- Put a trivet in the bottom of your pressure cooker.
- Add a cup or a cup and a half of water. If you have an 8-quart pot, add two cups of water.
- Put the frozen ground beef inside. Preferably, put a pound of meat at a time. This amount would take 5 or 6 minutes to defrost.
- Grab the lid and put it tightly on the top of the pressure cooker.
- Set the cooking time manually to six minutes on high pressure.
- Wait until the timer beeps, Push the valve to release pressure, and remove the lid to see your defrosted ground beef.
WARNING: Keep in mind that this method is not for cooking the meat but to defrost most of it. A large chunk in the center may still be stuck together, but you can use a spoon to break it apart. Make sure to brown the ground beef to guarantee it’s safe to eat.
Some Additional Tips
Don’t forget to put these tips into practice to defrost and cut ground beef properly.
Tip 1: Never use a blunt knife
Using a dull knife to cut fresh meat is a struggle, so it would be twice as difficult if you use it to cut completely frozen meat. Not only it is nearly impossible but also dangerous because the blade can slip and hit the hand you use to hold the frozen beef firmly. Therefore, you should never use a blunt knife for this purpose.
Recommendation: Make sure to use a sharp blade to guarantee a solid grip on the frozen food for a saw-like cutting motion. A sharpened serrated edge will hold on to the meat, and you can use that to apply as much pressure as needed to cut through the center.
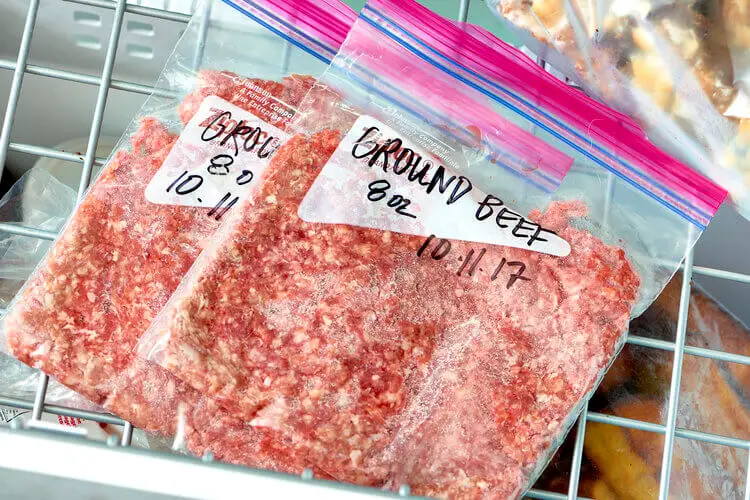
Tip 2: Cut ground beef into small sections before freezing
Cutting ground beef into smaller sections and putting it inside a resealable large freezer bag can make your next meal much easier.
- Divvy ground beef and put it inside resealable bags before freezing. If you want to be more precise, use a scale. This way, you’ll know the exact amount of meat you’re putting in each bag. Ideally, half a pound per bag is great.
- Use a rolling pin to flatten the patties. Turn them into 1/2-inch thick pieces.
- Press the bags to remove excess air, and seal the bags.
If you follow these steps, defrosting the meat, later on, will be faster.
Tip 3: Don’t freeze ground beef after microwaving
Using the microwave is one of the fastest solutions to unfreeze ground beef, but this method has a major disadvantage.
When the microwave is defrosting food, it raises the temperature by 40-140°F. At this temperature, bacteria can grow and multiply rapidly. It’s important to remember that bacteria may still be present in frozen food, but they’re inactive. With rising temperatures, bacteria return to an active state.
Cooking the thawed food after microwaving will kill potential bacteria growth.
If you want to refreeze raw meat again after putting it through the microwave, you’ll have to cook it first.
Tip 4: When to refreeze thawed ground beef
There are two situations in which you can refreeze thawed ground beef safely.
Situation 1: You thawed the meat in the refrigerator and kept it there. As recommended by the USDA’s Food Safety and Inspection Service, you can refreeze thawed ground beef if it remained in the refrigerator for a short time of three or fewer days.
But that doesn’t mean you can do it time and time again. Thawing and refreezing meat multiple times will cause it to lose moisture, and the texture will change. When that happens, the grilled burger won’t taste the same. Save these meats for soups or stews, where texture doesn’t matter much.
Situation 2: You cooked the thawed meat completely. If you thawed ground beef but you didn’t use all of it, you can refreeze it if you cook it entirely. Make sure there’s no pink in the center and remove excess fat. Let it cool off, and store it in safe containers inside the refrigerator. This meat will remain safe for the next four months.
Remember: Cooked beef will also lose some of its consistency and texture when you refreeze it.
What Is the Fastest Way to Unfreeze Meat?
The fastest way to defrost meat is to put it through a microwave cycle. Check the instructions above to do it properly and safely.
Do I Need to Thaw Frozen Ground Beef?
You have to thaw frozen ground meat to reshape it into smaller bits like patties or for making meatloaves.
Is It Safe to Thaw Meat Overnight on the Counter?
Thawing meat overnight on the counter is not safe. Food and meats are safe while frozen, but existing bacteria can multiply when the food gets warmer than 40°F, which is regular room temperature. Therefore, you should not leave the meat out to defrost or thaw at room temperature for longer than an hour.
How to Cut Frozen Meat Without Thawing?
You can cut frozen meat using several tools, like a regular heavy-duty kitchen knife, an electric knife, or a butcher saw. In many cases, you have to defrost the meat slightly to make sure the blades pierce through.
Can I Just Cook Frozen Beef?
You can cook frozen ground beef without a problem, but the cooking time will be 50% longer than it would originally take with fully thawed or fresh meats. However, it would be better to thaw the meat first. If you do, you’ll guarantee that both the inside and outside cook evenly.