If you’re a first-time pocket knife owner, it can be confusing if your knife’s blade starts to lose its sharpness. But since you’re here, it means you’re seriously considering sharpening your knife.
Good on you! A common misconception about knife-sharpening is that it may actually damage the knife’s blade. While that’s certainly a possibility, it’s only true if you’re doing it wrong.
“But how to sharpen a pocket knife the right way?” you say. Don’t worry—we’ve got the answer to that question!
Keep in mind that there’s more than one right way. Below, we’ve only covered one method. You’re welcome to look elsewhere for other methods, of course, but in our opinion, this is the easiest.
What You’ll Need?
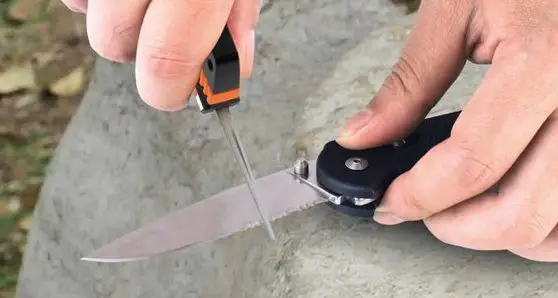
To make your life much easier I would recommend checking out this portable knife sharpener. It is easy to carry and flexible to use.
When it comes down to it, the business of sharpening your knife can be both difficult and easy at the same time. How easy it will be, though, depends on the quality of the materials you are using.
So, keeping that in mind here’s a detailed guide to what tools you’ll be needing, and precisely why you need each of them.
Sharpening Stone / Whetstone
In the same way that there are so many different kinds of knives out there, there are also a variety of different sharpening stones that you can pick from. Ultimately, what stone you end up choosing depends on personal preference and, more importantly, functionality.
So what kind of stone should you get? Well, as we said, it’s up to you! But as a general rule, the more expensive or valuable your knife is, the higher the quality of the sharpening stone should be. Check out our best pocket knife article, if you are looking for one.
On the flip side, if you’re a beginner with a low to mid-range knife, or if it’s a pocket knife you’re using that doesn’t require high maintenance, then you can get away with a cheaper stone. In fact, most hardware stores sell them at about $10 a pop. Cheap, right?
It can be difficult to settle on just one kind of sharpening stone, but for most knife owners, it takes a bit of experimentation and trial runs to figure out the best fit.
Now for a couple of basic facts about sharpening stones that you should know.
First of all, most sharpening stones typically have two sides. On one side is a rough grit, and on the other, a fine grit. The finer the grit, the sharper your blade will come out; however, the operation is usually started by sharpening on the rough side first!
Secondly, a coarser stone (or one with a rougher grit) is preferred for knives whose blades have a lot of burrs and flat spots. The coarseness helps to even out any problem areas before you flip to a finer grit.
Strop
If you haven’t heard of a leather strop before, it looks like a long, narrow piece of something soft, but it’s also quite thick. Strops can be made from a number of different materials, such as canvas, leather, denim fabric, or even very soft types of wood. Generally, leather strops are preferred, but they are relatively more expensive.
The point of using a strop is basically to sharpen the edge of your knife’s blade. Furthermore, once your knife has been sharpened, there’s a possibility that it will retain some burrs and flat spots. The strop helps to do away with those.
Lubricant
Although this item is mentioned in our list of required materials, it’s mostly an optional addition, especially if you’re using a basic sharpening stone. However, it’s also true that the biggest experts in knife-sharpening swear by the importance of using a lubricant.
We have thoroughly researched and reviewed knife oil by top brands here, do not forget to check that out.
Why is it required? Well, the primary purpose of the lube is to lessen the frictional heat that occurs as a result of sharpening the knife on a stone. This is important because, if there’s too much heat, your blade might actually end up getting warped.
Furthermore, lubrication facilitates the removal of “swarf” or knife debris, which results from grinding.
Lubricants for knife sharpening can come in the form of water or oil. Mineral oil is thought to be the best option for the purposes of sharpening your knife. A regular bottle of lubricating oil will set you back around $5 from the majority of hardware stores.
How to Sharpen Your Knife?
After much ado, now it’s finally time to learn how your knife is meant to be sharpened. We hope you have everything you need. Remember to carry out your sharpening activities in a secure area where pets or children can’t access you. This is also important for your concentration!
Step 1: Figure Out the Rough Side
You should always start sharpening your knife on the rough grit. This is especially true for those who are trying to sharpen a dull blade, which will require much more friction to gain back some of its sharpness.
You’ll usually be able to tell which side of the stone is rougher just by looking at it: it’ll have a bumpier, more porous, and more abrasive surface. Otherwise, you can opt to test it out with your thumbnail, by scratching the surface with it.
Another method is to pour some water on both sides and see which side absorbs it faster—that’s the rough grit.
Step 2: Prepare the Stone
This is where your lubricant comes in! As we mentioned, mineral oil is the best option. Pour it liberally over the stone’s surface. This doesn’t mean you should flood or drench the thing, but be generous with how much you pour.
If you’re not using a stone, skip this step, of course.
Step 3: Set Up the Angle
Maybe you already know this, but your knife has to be held at an angle while sharpening. And you heard it here first: the best angle to sharpen your knife at is 22.5 degrees (pro tip: that’s half of 45 degrees, which is half of 90 degrees, which is a right angle. Quick maths!).
“But why does my knife have to be sharpened at an angle at all?” you’re wondering. Because, unless it’s at an angle, you will most likely end up damaging the blade’s edge.
But fear not! You don’t have to get a perfect 22.5 degrees each time. As long as you’re between 17 and 20 degrees, you’ll be good to go. And if you’re using a pocket knife, your best bet is to use a 15-degree angle.
It might be difficult to get used to figuring out the angle. That’s normal because it’s a process that takes a lot of practice. However, you don’t have to wait for that day to come—you can opt to buy a sharpening guide, which will cut your work our for you in a jiffy. You can get them at around $10 apiece.
Step 4: Begin Sharpening Your Knife
Yes, it’s finally time! After ensuring that you have the required angle, you can begin sharpening—on the rough side! To imagine what the motion feels like, imagine that you’re slicing off a little, surface-level piece of the stone. Apply just a small amount of pressure, not too much.
An important note for those whose knives have longer or curved blades: you should remember to sweep the blade sideways. This ensures that the entire edge of the blade receives even sharpening.
Keep sharpening until you’ve done it anywhere between 6 to 12 times. Then, flip the blade over and sharpen the other side as well using the same number of strokes.
Once you’ve completed an equal number of strokes, now you should start taking alternating strokes. After one side has been sharpened, flip it over and do it on the other side, and so on and so forth.
Step 5: Sharpen Using the Fine Grit
Yes! You’ve successfully completed the sharpening of your stone on the rough grit of your stone. Now, of course, it’s time to do the same thing on the fine grit, so as to even out any burrs your knife’s blade may have been afflicted by.
Use the exact same process as when you were sharpening on the rough side.
Step 6: Lay Out the Strop
Now, this is where your strop comes in. No matter what material it’s made of, your job is to ensure that it lays flat on whatever surface you’re putting it on. Basically, the strop will be used in the same way as your stone.
Once you’ve laid it down, test the angle with your knife, once again. Remember, just the edge of the blade should be touching the strop at a tilted angle.
Step 7: Polish Your Knife on the Strop
Now it’s time to get your knife looking brand spanking new! Grind the knife slowly over the surface of the strop in much the same way that you did when sharpening it; however, it should be done much more deliberately and slowly, if you really want to get rid of serrations and flat spots.
One important factor to remember is that if your knife begins curving upwards while you’re polishing it, that’s a sign that you’re doing it too fast. Remember, the process has to be very cautious. This is especially true if your strop has a somewhat abrasive surface—so check before you buy.
Step 8: Check for Irregularities
Once you’re done sharpening and polishing your knife, now it’s time to re-check and make sure that you’ve done the job properly. Ensure that there are no micro-serrations, flat spots, or other problem areas on the knife.
If you notice any issues, you might want to consider replacing your stone with one whose rough side is much rougher—that’s usually the root of the problem. If you’re going shopping for a new whetstone, do some research first; there are so many options on the market!
Final Words
No matter how good your pocket knife is, you will one day have to sharpen it. Hopefully, now you have a clearer idea of how that is done.
Remember, though, that there are other methods of doing it. The steps we have shared above might be for one of the simpler methods, but it’s definitely an effective one.
Good luck, and we hope that your knives are always as sharp as you like them!