“Annealing is heat treating.”
If you’ve heard it from someone, they’re not completely right. They’re not wrong either. In fact, Annealing is a form of heat treating where you slowly increase the heat when a file of steel is in the kiln or oven. This improves the malleability of steel along with its tensile strength.
Okay, so “How to Anneal a File of Steel?”
Want the short answer of the question? You’ll need to select the type of file you’ll work with. Then, heat it up depending on the size. Ideally, 100 Degrees F above its critical temperature. Let it cool slowly and then cut into smaller pieces for making knives, threads of a shaft, etc.
So, what’s the long answer? Well, this is what I’ll be discussing in this article along with a few tips and tricks of my own to help you out.
What Does Annealing Actually Mean?
Annealing is actually a three-fold act that helps to soften the steel instead of hardening it.
The first part involves heating that metal beyond its recrystallization temperature. Don’t worry, you won’t have to touch the metal (take cast iron or steel in this case). All you need to do is to look. You’ll notice the object turning red after some time.
Secondly, we must let it be without fiddling with the temperature for a few hours. The third act begins when the steel cools down in the furnace that we used to heat it up in the first place. It ends when the steel or cast-iron returns to normal temperature.
Interesting Fact: Annealing has roots in ancient Japan. Swordsmiths followed a similar method of melting iron ore and shaping it into a sharp blade.
How to Anneal a File of Steel for Knife Making?
Well, there are several ways you can do annealing, below we will discuss the most easiest method of annealing files.
What Are Some of the Tools Required for Annealing?
The list is obvious.
- A file of steel.
- A Pan
- A heat source (an oven or a torch)
- Vermiculite if you don’t have an annealing furnace.
Once you have all these things ready and by your side, you’re ready for the process to begin. We can divide all the information into four specific steps.
Step 1: Fill an Oven-Proof Pan with Vermiculite
For the uninitiated, vermiculite is a mineral. More specifically, an insulator. Like wood ash, it traps the heat and prevents rapid cooling of objects like carbon steels. Make sure to take out an oven-proof pan and fill it to the brim with this mineral.
It’s important to fill the pan before heating it (Pan should be big enough to hold the file). Once we heat the file, it won’t be able to escape the pan and will circulate from one end to another. In simpler terms, the heat will “Sit Well” in time with the file. Rapid cooling sometimes bends the steel if your files are too thin.
Vermiculite prevents that from happening. However, I’d vote against using moist vermiculite for the job. Moisture and heated steel don’t go well together.
Oven-proof pans are great at withstanding high-temperature levels. These things can survive in a mini forge as well. There’s no chance of heat bending the pan itself. Hence, even if you’re using a mini forge or a torch, these things will do just fine inside.
Step 2: Heat Steel File Until It’s Orange-Red in Color
This next step involves heating the file gradually. Keep heating it as the temperature increases. Heat the file until it becomes non-magnetic. You should continue the process until you see the color of the steel change. It’ll be bright red in time. The color will change to orange-ish after a while.

Now, you can heat your steel or spring steel using two or three options.
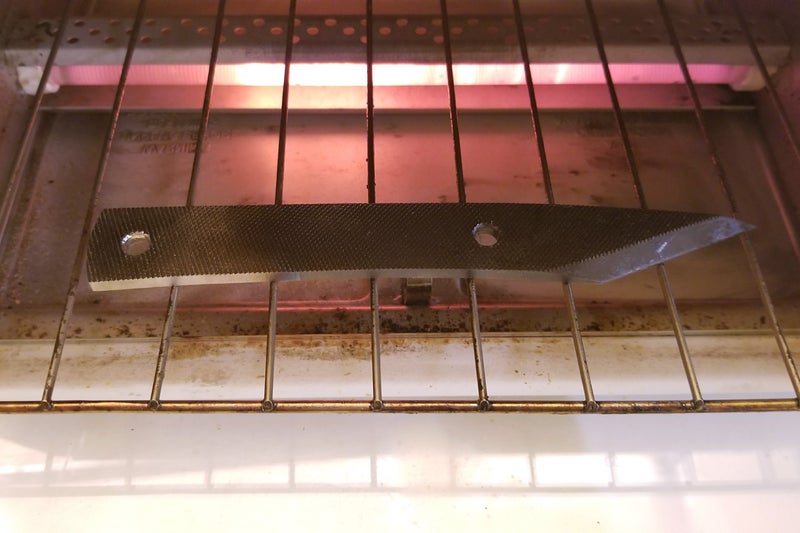
Using an Oven for Heat-Treating

I favor oven heating above all else for a number of reasons. First up, you can see where you’re going. I mean, people can monitor temperature levels. Good ovens will let you heat the metal within 1450 to 1650 degrees Fahrenheit. Regarding what type of material you should be using for best results, it should be 1050-grade steel.
Regarding the thickness of the steel file, you should go with 4 inches on the thick side. Go with 2-inch thickness on the tinner side of things. This is the area where sharpness of your file knives will develop once you temper it well.
One good thing about an oven is the fact that you’ll have the utmost control over the process. Also, you’ll be able to anneal steel to its best. DIYers can have this done from the comfort of their homes. They won’t even have to be there when it happens. People can just program the oven and be done with it.
People can even set up the “Cooldown” timer when working with an oven as well. For instance, I can very well set the cooldown period for my file of steel to be 70 degrees Fahrenheit. However, heat-treating using an oven can be a bit time-consuming as well.
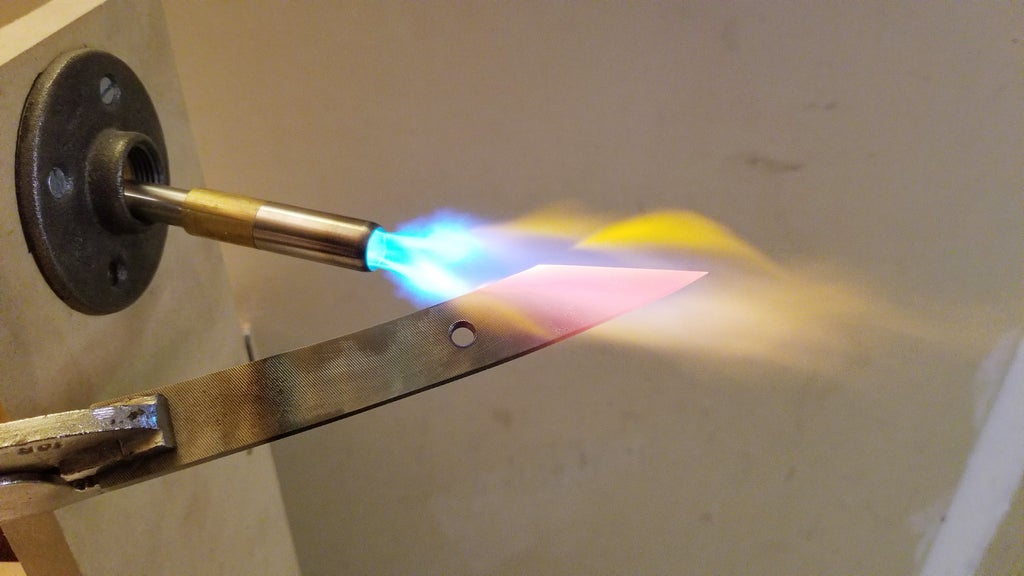
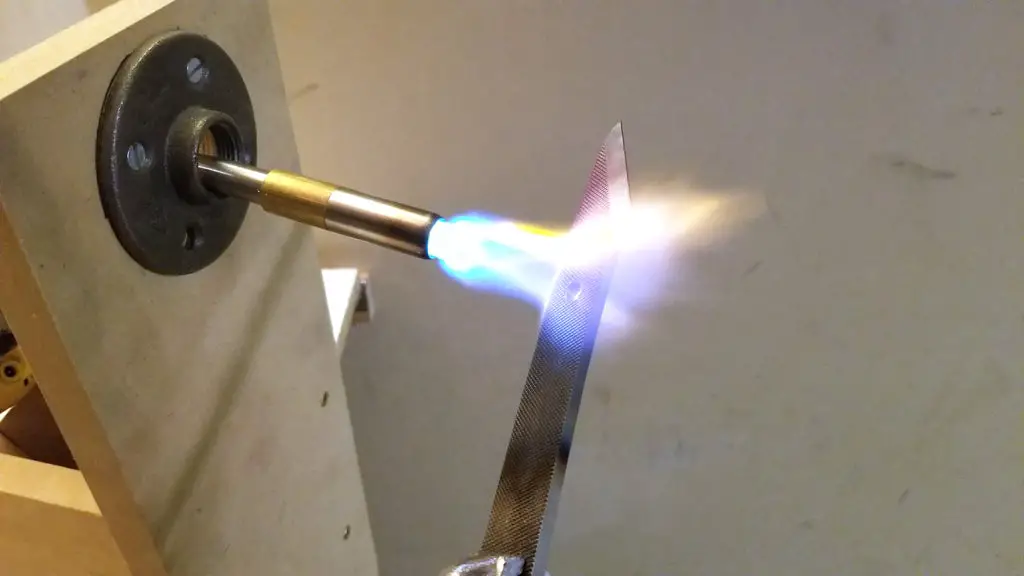
Heat-Treating Using a Torch

You’ll need to have some skill if you want to work with this thing. A torch is the perfect tool when we’re working with a small diameter file. All you need to do is to keep the flame away from the thinner part of the file. When working with a torch, you’ll be more in control. Hence, you’ll be able to tell when the file is orange-red.
This method is useful when you’re working with smaller pieces. Larger pieces will only consume more fuel and won’t yield too much of a result.
Step 3: Don’t Forget to Insert the Hot File in the Vermiculite Stuffed Pan
We need Vermiculite to slowly drain the heat out of the steel. Call it slow cooling if you would. This will allow the metal to retain its softness. People also use sand or ashes for the job. However, I’m more in the favor of using a mineral rather than sand mixed with roots and stones. It will mess with the steel’s quality.
All you have to do is to bury the file you want to anneal deep into the pan and cover it in the substance. For vermiculite, use at least 5-gallon pail of it when burying for a knife. Don’t worry, they’re cheap. You won’t have to shake your wallet too much for burying knife blades.
Step 4: Keep it Buried for 12 Hours
Yes, you heard me… 12 hours is all it will take. If you’re using an oven, make sure you turn it off in the meantime. This will slowly cool your file down to room temp and make it softer than before. Make sure to get a hacksaw ready and by your side. Once it is being cooled down cut the file into manageable pieces after it’s cold.
Why Should I Anneal a File in the First Place?
You could make a knife without annealing a file, right? Technically, yes. However, the knife would be fragile. Annealing increases steel’s inherent strength, durability, elongation, and ductility among other things.
Case and point: Knife with annealed steel would be stronger, better, and can withstand harsh usage on a chef’s counter.
Another thing to notice is that a heat-tempered steel sheet (annealing is also referred to as heat tempering in some parts of the world) is easier to bend.
This is because the steel is softer than before. Hardened knives can break under extreme conditions. If you’re not careful enough, these things can cause major injuries as well.
I prefer to anneal steel myself from a fresh block. Hardened steel is a big “No-No” for me. Why? Well, hardened steel is infinitely difficult to sand and grind. It may cost your sanding or grinding machine if you’re not careful. It’s better to heat-treat the steel yourself.
Using untreated, hardened steel might cause your knives to crack when at work. Trust me, this is not a pretty sight. As I said, it may and most probably will cause injuries. There ARE some advantages of annealing before you temper your kitchen knives.
Furthermore, annealing might be needed for existing knives as well. I mean, all of us have seen blue-steel knives, haven’t we? Yup, you’re right. Steel or cast iron turning blue means it has lost its temper. You’ll need to heat-treat it again to bring back the softness it once had.
Frequently Asked Questions (FAQ)
Do I Need to Quench After Annealing?
It depends on what type of material you’re working with. If it’s silver, you can immediately quench after heating the metal. When someone is annealing a file for knife making, it’s different. The steel should slowly cool down before you cut it into smaller pieces with a hacksaw. For oil quench, we prefer canola oil.
Can You Make a Knife Without Heat Treating?
Technically, you can. However, it won’t be any good. The knife in question, won’t hold much of an edge. There won’t be any sharpness to it. The end product will lose any potential as a knife.
What is the Best Material to Make a Knife Out of?
I’d say carbon steel if you’re looking for a kitchen knife. It’s the premiere choice for any and all professional chefs out there. Carbon steel retains edge better than some of the competing metals.
Other than carbon steel, people can make quality knives out of stainless steel. Stainless steel is super hard to break when tempered correctly. Also, it’s known to be flexible and bends making our lives easier on the counter.
I’ve also come across knives made of titanium. You’ve heard of “Dive Knives” perhaps? These babies need to be corrosion-resistant to be of any use. Titanium is one of the best in that regard.
Well, as it turns out… you can make knives out of almost any material. It’ll depend on what type of usage the small tool has in your scheme of things.
Is File Steel Good for Knife Making?
In one word, “No.” File steel is cold and hard. You’ll have difficulties shaping it for a knife. That’s where Annealing comes into the frame. Annealing heat-treats the steel in a way it makes the material soft and easy to cut into pieces. Annealed knives retain their edge better than filled ones.
What Does Annealing Do to Steel?
This is what I’m going on about in this entire article. Besides strengthening steel and improving on its ductility, annealing removes the impurities of the metal as well. Annealing makes it soft to work with and gives it better edge retention than the hardened state.
How to Anneal a Nicholson File?
You’ll have to follow the annealing process I mentioned to a tee. After you’re done, make sure to test the file out for proper annealing. I’d take another steel file and rub them against each other. This is to see if the newer one bites into the skates. If that does, it’s a quality job.
Nicholson steel produces scales once annealed. People will have to dip the file in vinegar overnight after it’s been processed just to remove the scale and condition it.
What Temperature Should I Heat Up On to Anneal a File?
It depends on the material you’re using and the heat source as well. For example, Microwave oven can reach temperature levels of up to 1650 degrees Fahrenheit if you’re willing to take the route. It’s ideal for 1050-grade steel. Highly Carbonated steel requires higher temperature. Smaller heat sources require more temperature before they can anneal a file for knife making.
Are Kilns Safe?
When you fire a kiln, you should always maintain safety precautions. That’s because VOCs (Volatile Organic Compounds) get released due to the high operating temperature. So, it can be a fire hazard if you’re not careful enough.
My Last Words
If you’ve endured through this piece, congrats! Now, you know how to anneal a file for knife making without any problem. Along with some tips and tricks of my own, I must add. For the most part, I concentrated on stainless steel in this article. However, this is not to say you cannot anneal other materials.
Yes, you can take them to the task as well. For example, copper can be an ideal metal for the job along with titanium. However, annealing copper and titanium will take some doing. Copper needs to be heated at 700 degrees Fahrenheit for a start. It’s better to stick with high carbon steel for beginners.
Regarding heat sources, the ideal thing should be an oven (if you don’t have a kiln or a forge) since you can control the temperature via readouts. Thanks a lot for your time!


Well done. Well done indeed.
Very nice article, thanks.
Thanks, Smith, for reading the article. Please do share it on your social media to reach more people. Thanks again.